|

Windows 95/98/ME Chebucto Plus Setup
Here is the setup information for Windows 95, Windows 98 and Windows ME.
You will need to have your Chebucto
Plus password before proceeding. You may also require your
Windows 95, 98 or ME CD-ROM (or disks). Clicking on a screen shot will
show a larger version.
Windows 95/ 98/ ME Manual Setup
Windows 98 and ME users may skip ahead.
There are two versions of Windows 95: the original and OSR2, which
Microsoft released in December 1996.
If you purchased your computer or copy of Windows 95 before December 1996,
you should have the original Windows 95.
If you purchased your computer or copy of Windows 95 since December 1996,
you probably have OSR2 (but may have purchased old stock with the original version).
To determine which version of Windows 95 you have, follow these steps:
- While holding down the ALT key, double-click on the My Computer
icon on your desktop
- In the System Properties dialog box if it lists your system as being
Microsoft Windows 95 4.00.950 B, then you are running the OSR2 version, if it just
lists Microsoft Windows 95 4.00.950 or 4.00.950 A, then you are running the
original release of Windows 95.
- Click on OK button
Setting up Windows 95/ 98/ ME to use Chebucto
Plus is a four step process:
- Install Dial-Up Networking (if not
already
installed)
- Install TCP/IP Protocol (if not already
installed)
- Define a Dial-Up Networking Connection
- Get Connected!
Step 1. Install Dial-Up Networking
| 1.0 |
Windows 98 and ME usually has Dial Up
Networking already installed. To check on this, click the Start
button, then go to Programs, Accessories, Communications and see if
Dial Up Networking is there. If it is, you can skip
ahead. In Windows 95, it's in Programs, Accessories.
|
| 1.1 |
Click on the Start button |
| 1.2 |
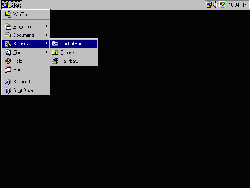
Highlight Settings and then click on
Control Panel
|
| 1.3 |
Double-click on Add/Remove
Programs |
| 1.4 |
Click on Windows Setup tab |
| 1.5 |
Click on Communications in the Components list |
| 1.6 |
Click on Details button |
| 1.7 |
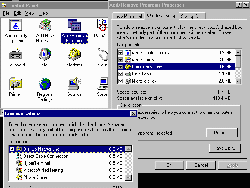
If Dial-Up Networking has a check mark
beside it, click OKto close each of the open dialog boxes and
skip steps 1.8 - 1.13, otherwise click on
Dial-Up Networking check box in the Components list and continue
with step 1.8.
|
| 1.8 |
Click on OK button |
| 1.9 |
Click on OK button in Add/Remove
Programs dialog box |
| 1.10 |
Insert the Windows CD-ROM (or disks if
applicable) Note: If Windows 95 was pre-installed on your computer you
will not need to insert the CD-ROM or disks. |
| 1.11 |
When you receive the message indicating that
you must identify your computer on the network, click on the OK
button. |
| 1.12 |
Type your last name in the Computer
Name field, type Chebucto Plus in the Workgroup field
and click on the Close button |
| 1.13 |
Click on OK button in Dial-Up
Networking Setup dialog box |
Step 2. Install TCP/IP Protocol
| 2.1 |
Double-click on Network in Control
Panel |
| 2.2 |
You want to have three things showing here:
Client for Microsoft Networks, Dial Up Adaptor, and
TCP/IP. There may be more than these there, but you need these
three to use our service. If these three things are already there, you can
skip ahead.
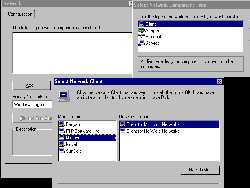
If Client for Microsoft Networks is not
listed, click on Add then double click on Client then click
on Microsoft then double click on Client for Microsoft
Networks. In the Select Network Component Type window, double
click on Client. In the Select Device window, double click
on Microsoft in the Manufacturers list then double click on
Dial-Up Adapter. You may be prompted for the Windows CD-ROM or
disks.
|
| 2.3 |
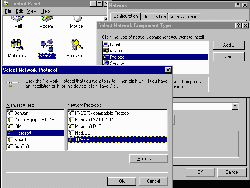
If TCP/IP is not listed, click on
Add button, double click on Protocol,, click on
Microsoft in the Manufacturers list, then double click on
TCP/IP in the Network Protocols list. You may be prompted for the
Windows CD-ROM or disks.
|
| 2.4 |
Click on OK button in Network dialog
box |
| 2.5 |
Insert CD-ROM or disks as requested (if
applicable) |
| 2.6 |
Click on Yes button in Systems Settings
Change dialog box to restart computer |
| 2.7 |
When the system restarts and you are presented
with an Enter Windows Password dialog box, enter your Windows system
password. |
Step 3. Define a Dial-Up Networking Connection
| 3.1 |
Click on Start button |
| 3.2 |
Highlight Programs, Accessories. In
Windows 98 and ME, it's Programs, Accessories, Communications.
|
| 3.3 |
Click on Dial-Up Networking |
| 3.4 |
If you are running Windows 98, ME or the OSR2
release of Windows 95, a connection setup wizard will start and you can
click on the Next button, otherwise double-click on Make New
Connection |
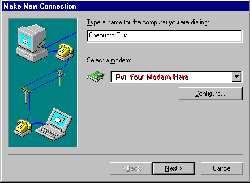
| 3.5 |
Type Chebucto Plus in the name
field |
| 3.6 |
Select a modem to use for the connection
if it is not already there.
|
| 3.7 |
Click the Next button |
| 3.8 |
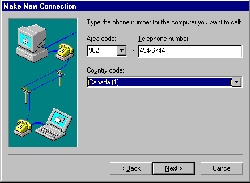
Type 494-6744 in the Telephone
Number field |
| 3.9 |
Choose Canada in the Country
Code field
|
| 3.10 |
Click on Next button |
| 3.11 |
Click on Finish button |
| 3.12 |
Click on Chebucto Plus and choose
Properties from the File menu (or right
click) |
| 3.13 |
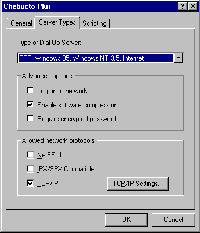
Click on Server Type button (or tab in
OSR2 release) in Chebucto Plus dialog box |
| 3.14 |
In Windows 95, select PPP: Windows 95,
Windows NT 3.5, Internet in Type of Dial-Up Server field. In Windows
98, it's PPP: Internet, Windows NT Server, Windows 98 and it should
already be showing. |
| 3.15 |
If Log on to Network is selected, click on check box to de-select
it (the check box should not have a check mark in it) |
| 3.16 |
If Require Encrypted Passwords is selected, click on check box
to de-select it (the check box should not have a check mark in it) |
| 3.17 |
If NetBEUI is selected, click on check box to de-select it (the
check box should not have a check mark in it) |
| 3.18 |
If IPX/SPX Compatible is selected, click on check box to de-select
it (the check box should not have a check mark in it) |
| 3.19 |
If TCP/IP is not selected, click on check box to select it (the
check box should have a check mark in it).
|
| 3.20 |
Click on the TCP/IP Settings button. Make sure the
Server assigned IP address box is checked. |
| 3.21 |
Click on Specify name server addresses. In the Primary
DNS window, type in: 192.75.95.129 and in the Secondary
DNS window, type in: 192.75.95.88. Leave the Primary and
Secondary WINS windows blank. Click on the
OK button in this window. |
| 3.21 |
Click on OK button in Chebucto Plus dialog box |
| 3.22 |
Close Dial-Up Networking window |
Step 4. Get Connected!
| 4.1 |
Click on Start button |
| 4.2 |
Highlight Program, Accessories. In
Windows 98, it's Programs, Accessories, Communications.
|
| 4.3 |
Click on Dial-Up Networking |
| 4.4 |
Double-click on Chebucto Plus |
| 4.5 |
Type your Chebucto Community Net Login ID
in the User Name field. |
| 4.6 |
Type your Chebucto Plus
password (which was emailed to you) in the Password
field. This is the only place where this password is used. Do not
use the password from your text-based account (typed in when you first
registered for the account) here. |
| 4.7 |
Click on Connect button. |
Your connection will now be established. To close the connection simply
double click on the Network icon in your system tray then click on the
Disconnect button in the Connected to Chebucto Plus dialog box.
Note: You could create a shortcut for the Chebucto Plus dialer on your
desktop if you want to have faster access to it. Hold down the Ctrl
key and click on the Chebucto Plus
connection icon. While still holding down the Ctrl key and the
mouse button, drag the icon over to your desktop and let go of the mouse
button and Ctrl key. If prompted whether you want to make a
shortcut to the dialer, answer yes.
Chebucto Plus Mail and News
Settings:
- SMTP Server = smtp.chebucto.ns.ca
- POP3 Server = pop.chebucto.ns.ca
- NNTP Server = news.dal.ca
You should make http://plus.chebucto.ns.ca the
default home page in your web browser as it has your session timer and
other useful Chebucto Plus links and
utilities. How you do this will vary from browser to browser; in Internet
Explorer it will be under Options or Internet Options
(depending on the version) and in Netscape Navigator it will be under
Preferences or Options (depending upon the version).
We would also recommend that you get a good anti-virus program for your
computer and keep it updated. You can do a web search for anti-virus
software.
|


